Guide to the chrome plating process
Chrome plating is not only time-consuming; it is expensive. However, when the job is complete, and the car looks as awesome as it did in the 1950s, it’s well worth the effort.
There are two types of chrome plating they include:
- Hard chrome plating
- Thin dense chrome plating
Hard chrome plating is used a lot more often than thin dense chrome plating. It is used on exterior items such as car bumpers.
Thin dense chrome plating is primarily used on interior surfaces. The layer that is applied is so thin it cannot cover large cracks and crevasse.
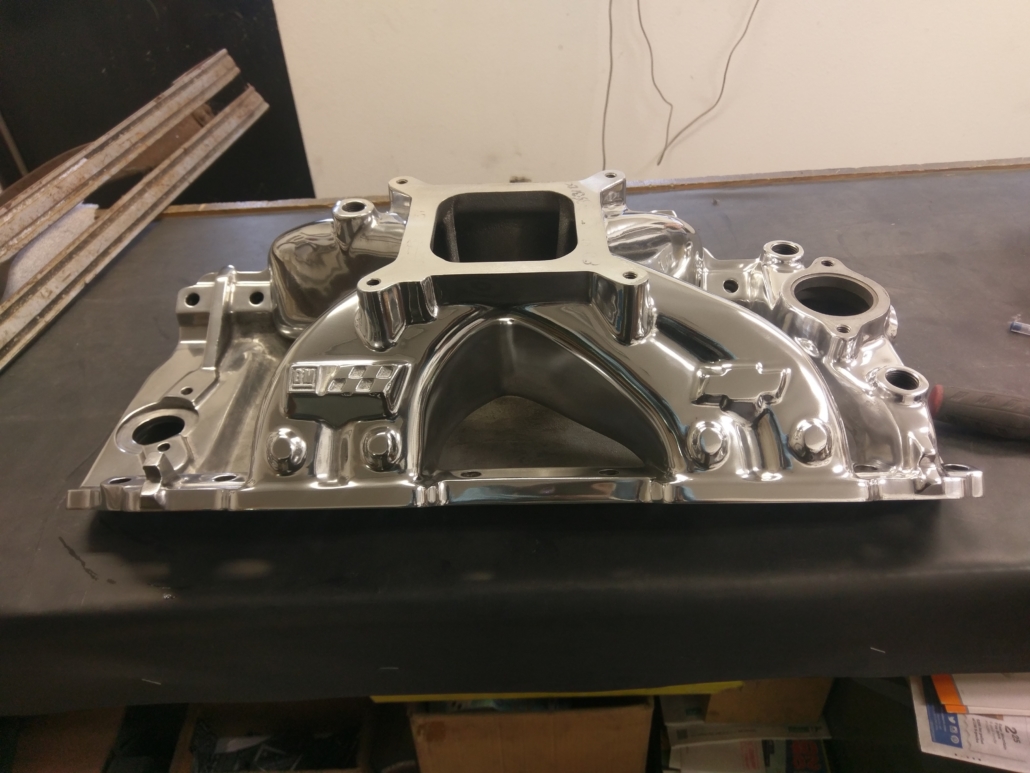
Hard Chrome Plating Steps
- Inspection – This is probably the most essential step. If the piece of metal has deteriorated beyond repair, you need to seriously think about whether it is worth repairing or purchasing a new one might be the best option. Assuming it is repairable, we will move on to the next step in the chrome plating process.
- Stripping –All materials must be removed from the metal, including the following:
- Old paint
- Oil
- Dirt
- Previous plating
- Rust
- Grease
If you attempt to start the chrome plating process before removing all the old material, you will have several bumps and blemishes, and you will ruin the metal. Don’t skip hard chrome plating process steps to save time or money.
- Repair and Restore – Fill any cracks, crevasse, or holes with brass or lead. Remove any dents or straighten them out so you can move on to the next step,
- Polish – The end goal of polishing is to have a piece of extremely polished metal. When you polish, you remove the metal on the surface. This is done by using different coarse wheels or belts. This is the first step in eliminating abrasive areas by cutting and grinding. Which makes the abrasive metal smoother with smaller grinds. When completed, you have an extremely polished piece of metal that is mostly free of scratches, pitting, and other blemishes.
- Racking and Wiring – Racks, hooks, and other techniques are used to hold the part and supply electrical contact.
- Prep & Cleaning – The parts must be impeccably cleaned before you can start plating. Even the tiniest fleck of dirt will produce a reject. Soap, water, and acid solutions will ensure a pristine surface.
- Copper Plating and Buffing – The copper plated parts are buffed to a dazzling shine. This delivers additional protection while helping fill pits and lines.
- Recleaning, Racking, and Wiring – Repeat steps five and six.
- Nickel Plating – Nickel gives it the rich polish and protection necessary for long-lasting chrome. The parts are then immersed in a nickel-plating mixture for 45 minutes to an hour.
- Chrome Plating – The chrome acts as a protective layer for the nickel. Preventing the nickel from tarnishing.
- Inspection – A final inspection is performed to make sure parts are clean and ready.
Once you have completed the exhausting hard chrome plating process steps, you will be left with a beautiful shiny chrome plating.

